Free Shipping on Parts Orders Over $45
Accessibility Statement
Knowledge Center
Maintenance
How often should you change your engine's air filter? When do you change your oil in your snow thrower? Check out this section for maintenance tips and schedules for all your outdoor power equipment!
Maintenance How Tos:
- Lawn Mower Maintenance: How to Change Oil
- General Riding Lawn Mower Maintenance
- How to Sharpen and Care for Your Walk Behind Lawn Mower Blade
- Garden Tiller Maintenance
Repairs
There is nothing more frustrating than broken lawn equipment. MTD provides lawn equipment repair information that will help you quickly and easily fix any malfunctioning equipment so you can get back to caring for your lawn and garden. Don't let a little bump in the road slow you down - let MTD's lawn care advice help answer your questions.
Repair How Tos:
View all Repair articles

Safety
Your lawn mower helps you to keep your lawn looking clean and well-kept. Find safety tips for all your outdoor power equipment. Whether you own a push mower, log splitter or snow thrower, MTD will keep you safe while you maintain your property.
Safety Articles and Videos:
- Self-Propelled Mower Safety: Lawn Mower Tips
- Push Mowers - Safety Tips
- How to Use a Garden Tiller Safely: Get Tiller Safety Tips
- Using a Log Splitter: Safely Operate Outdoor Equipment
General Advice & Tips
Need advice on the correct way to use your tiller or log splitter? Do you know what to do if you're mowing on an incline? Maintain your yard and garden like a pro with these handy operation tips!
Advice & Tips:
- Deluxe Universal Snow Cab Assembly and Installation
- Self-Propelled Mowers- Operation Tips
- Log Splitters- Operation Tips
- How to Use a Garden Tiller
- The Benefits of Pollen-Rich Flowers
Fall Seasonal Tips
Fall is an ideal time for lawn care. Our fall lawn care tips cover all the bases, including fertilization, reseeding, soil fertility, weed prevention and leaf removal. Proper lawn care in the fall will fortify your grass for winter and insure it's lush and healthy in the spring.
Links to Seasonal Tips:
View all Fall tips
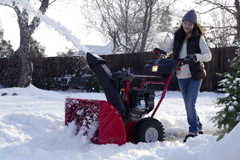
Winter Seasonal Tips
Even if your lawn is dormant in the winter, it still requires attention. Our winter lawn care tips feature advice on how to use, maintain and store your MTD snow blower, as well as how to protect your grass during the coldest months of the year. Proper lawn care will help you get the lush spring lawn you want.
Links to Seasonal Tips:
- Preparing Your Snow Blower for Off-Season Storage
- Maintaining Your Snow Blower Auger Parts
- How to Remove Snow
- Recommended Snow Blower Back-up Parts
- Snow Blower Repair
- How Should I Remove Snow from My Driveway?
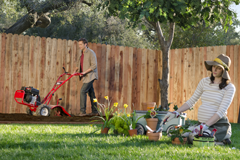
Spring Seasonal Tips
Spring is a very important season when it comes to caring for your lawn. After the hardships of winter, it needs careful attention as the days start to lengthen and the grass starts to grow. Getting off to a quick start with your spring lawn care routines is important, as it can help ensure a green and healthy lawn all season long. As the mowing season begins, be sure to review our spring lawn care tips for helpful information and advice.
Links to Seasonal Tips:
- Designing a Spring Landscape
- Prepping for a Spring Vegetable Garden
- Spring Yard Cleanup Tips
- Naturally Control Weeds
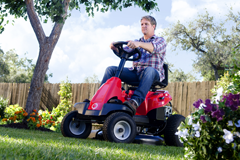
Summer Seasonal Tips
If spring lawn care is about establishing a healthy landscape, then summer lawn care is about maintaining one. Long days of high temperatures and little rainfall can take a toll on your yard. To avoid undoing the hard work you did in the spring and keep your landscape looking its best, make sure you're maintaining your Shop By Part Type and following proper summer lawn maintenance techniques. Our summer lawn care tips feature advice on watering your grass, boosting your curb appeal, starting a vegetable garden and more. Create a landscape you'll be proud of with our lawn care tips for summer.
Links to Seasonal Tips:
- Edging Flower Beds & Landscaping Borders
- Watering Grass to Keep it Green and Lush All Summer
- Edging Flower Beds & Landscaping Borders
- Six Tips to Achieve a Perfect Lawn